Classic Homemade Bread: Simple, Soft, and Delicious
Introduction:
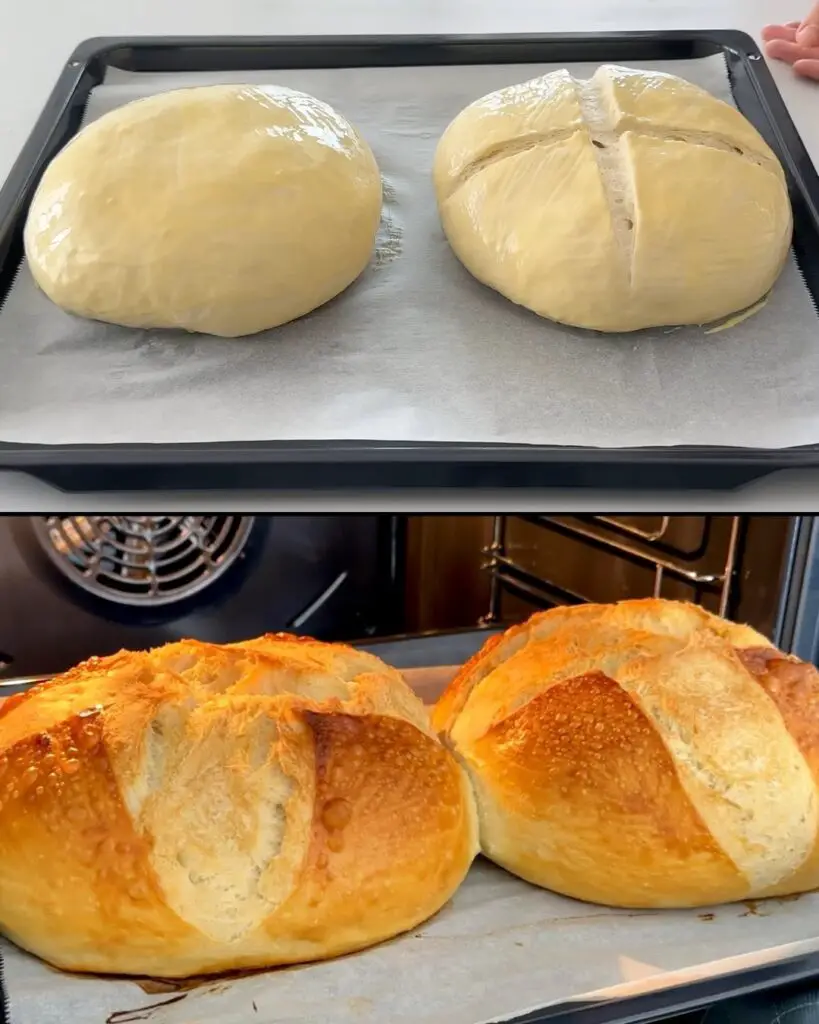
There’s something undeniably comforting and satisfying about the aroma of freshly baked bread wafting through your home. This Classic Homemade Bread recipe yields a simple yet delectable loaf with a soft, fluffy interior and a golden-brown, crusty exterior. Whether you enjoy it toasted with butter, used for sandwiches, or simply savor its warm, pillowy texture, this bread is a testament to the joys of homemade baking.
Why You’ll Love This Recipe:
- Minimal Ingredients: This recipe utilizes pantry staples, making it both accessible and budget-friendly.
- Easy to Follow: The instructions are clear and straightforward, suitable for both novice and experienced bakers.
- Versatile: This bread can be enjoyed in a variety of ways, making it an excellent addition to any meal.
- Rewarding: The satisfaction of crafting your own loaf of bread is truly unmatched, and the delicious results will have you eager to bake again and again.
INGREDIENTS YOU’LL NEED:
- For the Dough:
- 2 ¼ cups warm water (105-115°F/40-46°C)
- 2 ¼ teaspoons active dry yeast (1 standard packet)
- 1 tablespoon granulated sugar
- 3 ½ cups bread flour
- 2 ½ cups all-purpose flour
- 2 teaspoons salt
- 2 tablespoons olive oil (or melted unsalted butter)
HOW TO MAKE CLASSIC HOMEMADE BREAD:
STEP-BY-STEP INSTRUCTIONS:
-
Proof the Yeast: In a small bowl, combine the warm water, yeast, and sugar. Stir gently and let stand for 5-10 minutes, or until the mixture becomes frothy and bubbly. This indicates that the yeast is active and ready to use.
-
Combine the Dry Ingredients: In a large mixing bowl, whisk together the bread flour, all-purpose flour, and salt.
-
Make the Dough:
- Create a well in the center of the dry ingredients.
- Pour the proofed yeast mixture and the olive oil (or melted butter) into the well.
- Using a wooden spoon or your hands, gradually incorporate the wet ingredients into the dry ingredients until a shaggy dough forms.
-
Knead the Dough:
- Transfer the dough to a lightly floured surface.
- Knead for 10-12 minutes, or until the dough becomes smooth and elastic.
- If the dough is too sticky, add a little more flour, a tablespoon at a time.
-
First Rise (Bulk Fermentation):
- Lightly grease a large bowl with olive oil or cooking spray.
- Place the dough in the bowl, turning it to coat all sides with the oil.
- Cover the bowl with plastic wrap or a clean kitchen towel and let the dough rise in a warm, draft-free place until doubled in size, about 1-1.5 hours.
-
Shape the Dough:
- Gently punch down the risen dough to release the air.
- Shape the dough into a loaf and place it in a greased 9×5 inch loaf pan.
-
Second Rise (Proofing):
- Loosely cover the loaf pan with plastic wrap or a kitchen towel.
- Let the dough rise again in a warm place until it reaches about 1 inch above the rim of the pan, about 30-45 minutes.
-
Bake the Bread:
- Preheat your oven to 375°F (190°C).
- Bake the bread for 30-35 minutes, or until the top is golden brown and the bread sounds hollow when tapped.
- If the top is browning too quickly, loosely cover it with aluminum foil.
-
Cool and Enjoy:
- Remove the bread from the pan and let it cool completely on a wire rack before slicing and serving. Enjoy!
HELPFUL TIPS:
- Water Temperature: Ensure the water is warm, not hot, as hot water can kill the yeast.
- Kneading: Kneading is crucial for developing the gluten structure, which gives the bread its texture. Don’t rush this step!
- Warm Environment: A warm, draft-free spot is ideal for rising. You can create a warm environment by placing the bowl in a slightly warmed oven (turned off) or near a sunny window.
- Testing for Doneness: In addition to the hollow sound when tapped, an instant-read thermometer inserted into the center of the loaf should read 190-200°F (88-93°C).
- Patience is Key: Allow the bread to cool completely before slicing to prevent it from becoming gummy.
DETAILS:
- Prep Time: 20 minutes
- Rise Time: 1.5 – 2 hours
- Cook Time: 30-35 minutes
- Total Time: Approximately 3 hours
- Yield: 1 loaf
- Category: Bread
- Method: Baked
- Cuisine: International
- Diet: Vegetarian
NOTES:
- For a richer flavor, you can substitute 1 cup of the all-purpose flour with whole wheat flour.
- To add a touch of sweetness, you can include a tablespoon of honey or molasses to the dough.
- If you prefer a softer crust, brush the top of the loaf with melted butter or milk before baking.
FREQUENTLY ASKED QUESTIONS:
- Can I use instant yeast instead of active dry yeast? Yes, you can use instant yeast. Simply add it directly to the dry ingredients, skipping the proofing step.
- Why didn’t my dough rise? Several factors can affect the rise, including the temperature of the water, the freshness of the yeast, and the rising environment. Ensure the water is warm, not hot, the yeast is fresh, and the rising environment is warm and draft-free.
- How should I store homemade bread? Store cooled bread in a bread box or airtight container at room temperature for up to 3 days. For longer storage, you can freeze it.
STORAGE INSTRUCTIONS:
- Room Temperature: Store in a bread box or airtight container at room temperature for up to 3 days.
- Freeze: Wrap the bread tightly in plastic wrap and then in aluminum foil. Freeze for up to 3 months. Thaw overnight at room temperature or in the refrigerator.
CONCLUSION:
Baking your own bread is a rewarding experience, and this Classic Homemade Bread recipe offers a simple and delicious way to start. With basic ingredients and easy-to-follow steps, you’ll be enjoying the aroma and taste of freshly baked bread in your own kitchen. Happy baking!